Overview | JRiver Setup | Roon Setup | Firmware | Drivers
Install The USB Module
Following the directions in your DAC user guide, install the USB module into your MSB DAC or Digital Director.
Plug your USB module into your computer using a USB-A to USB-B cable.
Install the MSB Audio drivers following the instructions located > here.
Install JRiver
If you have not already done so, install the JRiver media center on your computer.
The download files can be found at the JRiver website below.
Enabling your device in JRiver
Step 1
Open JRiver on your computer and ensure the USB module is plugged in and your MSB DAC and/or Digital Director is turned on.
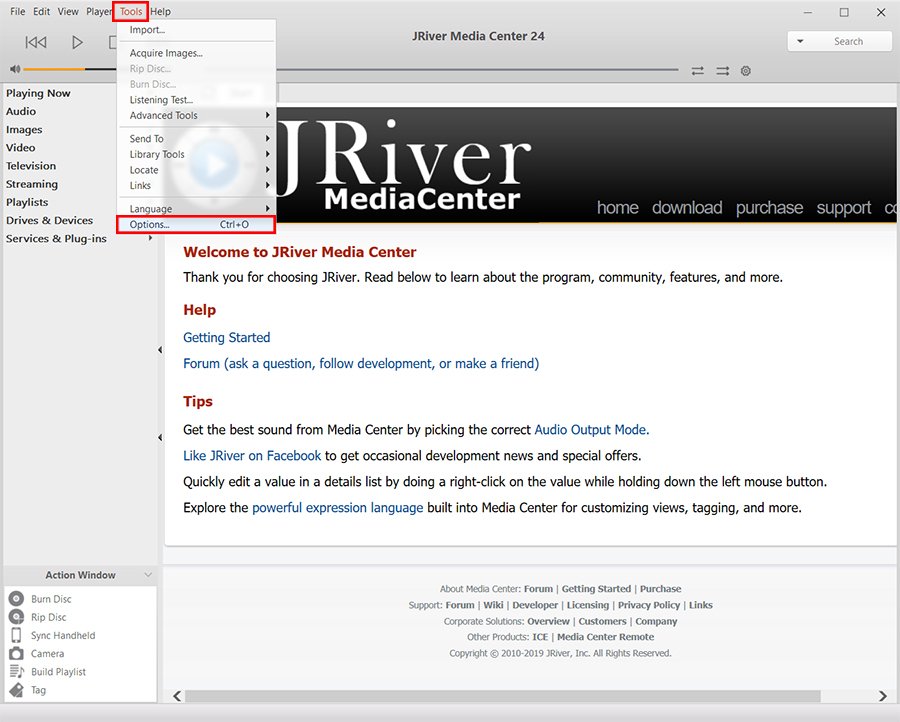
A. Select “Tools” from the top menu bar.
B. Select “Options” from the drop down panel.
Step 2
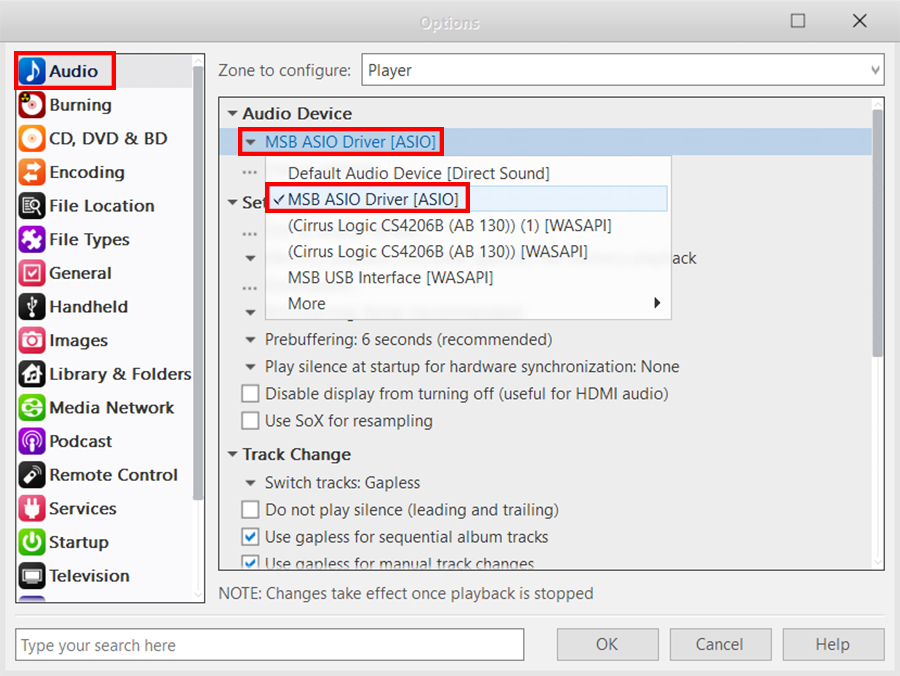
A. Select “Audio” from the side panel on the left.
B. Select the first drop down option below “Audio Device” from the main panel.
C. Select “MSB ASIO Driver [ASIO]” from the list.
Step 3
*** NOTE. This step is ONLY for use with 192kHz, 384kHz, and Standard Analog DAC USB modules. This step should be skipped when setting up ANY Quadrate and MQA versions. ***
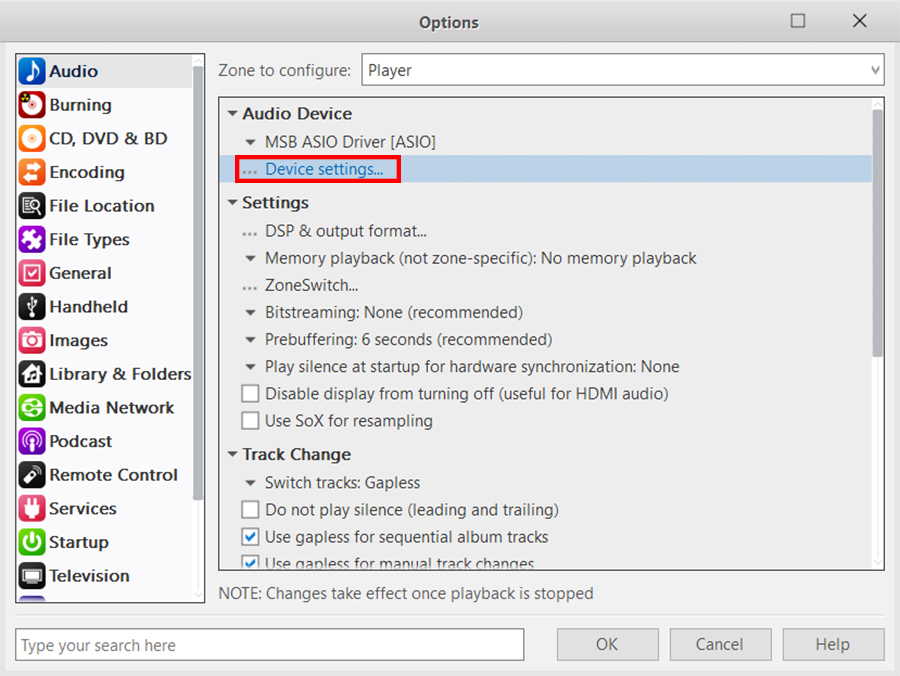
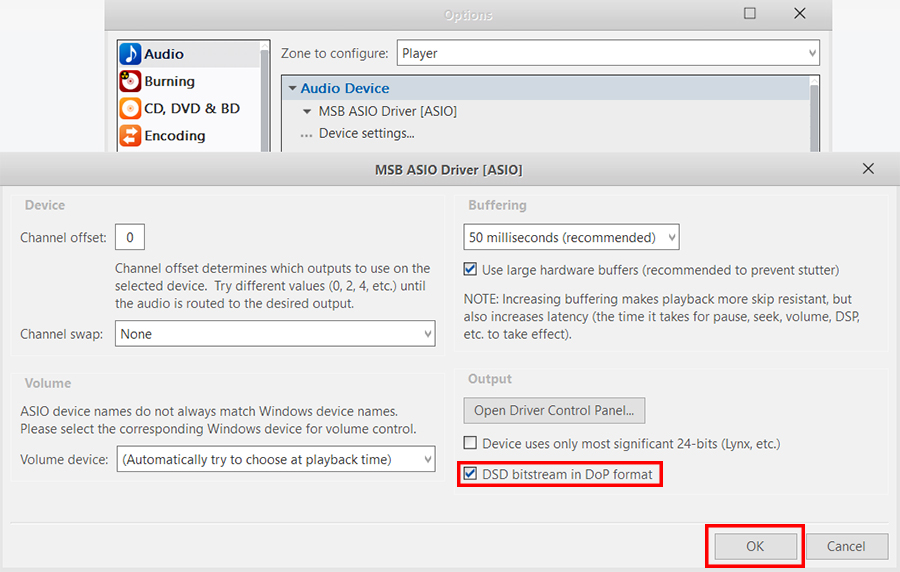
A. Select “Device settings…”
B. In the panel that comes up, check the box labeled “DSD bitstream in DOP format”, then select “OK”
Step 4
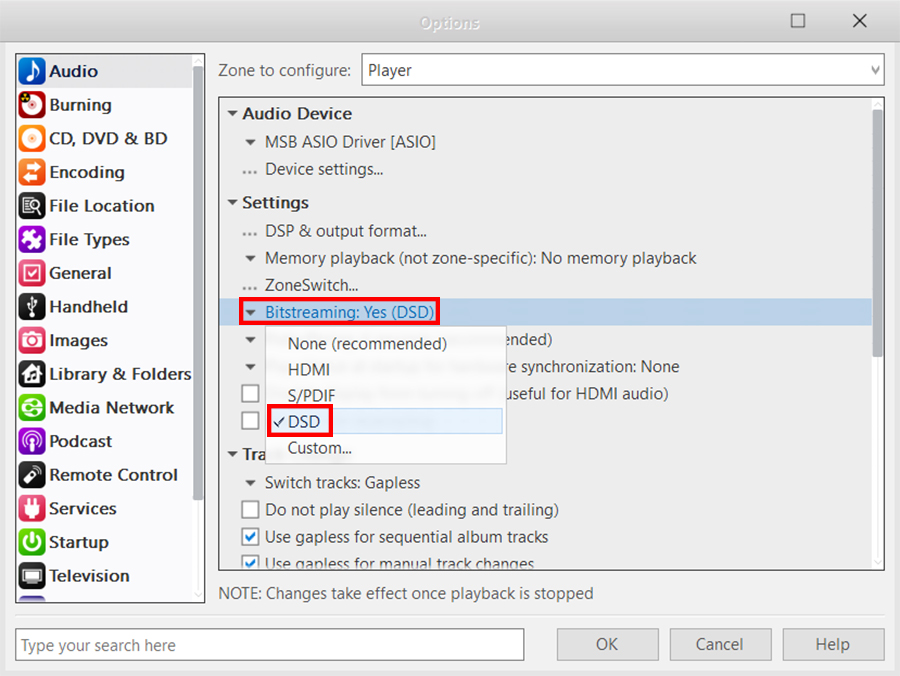
A. Select “Bitstreaming: None” under the “Settings” section and select “DSD” from the list.
Step 5
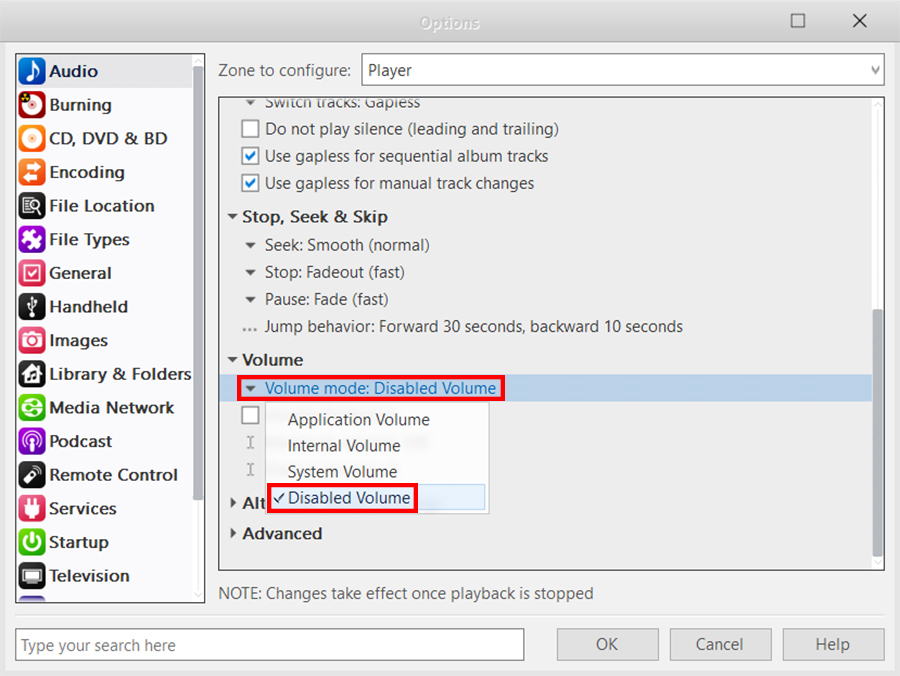
A. Select “Volume mode: … ” from under the “Volume” section and select “Disabled Volume” from the list.
*** NOTE. If you want or need to leave the volume control active for any reason, you can simply set the volume to 100 in JRiver when using the USB to not effect audio playback. ***
JRemote Setup
Updated 01.07.2019
Instructions using IPhone mobile app Version 3.25
You must finish the JRiver device setup above before starting the JRemote setup.
Step 1
*** NOTE. Before starting the JRemote setup for your USB you will need to compete steps 1 – 6 of the Network Renderer JRiver Setup to obtain an “Access Key” for your media library. ***
JRiver Media Center must be open on the host computer for the JRemote to function.
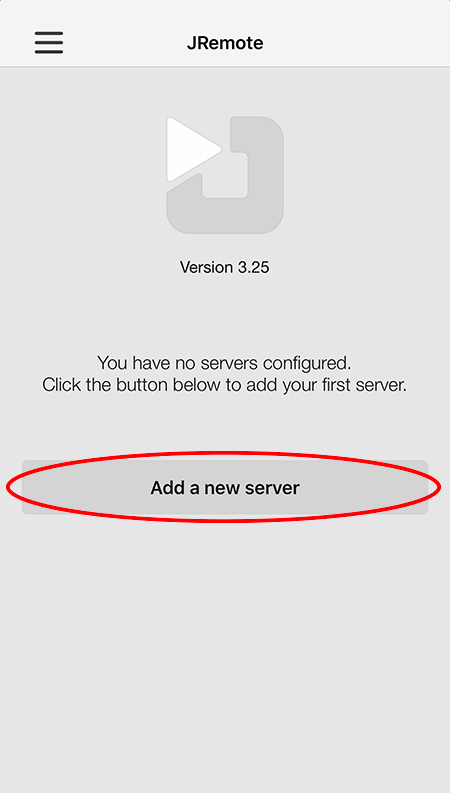
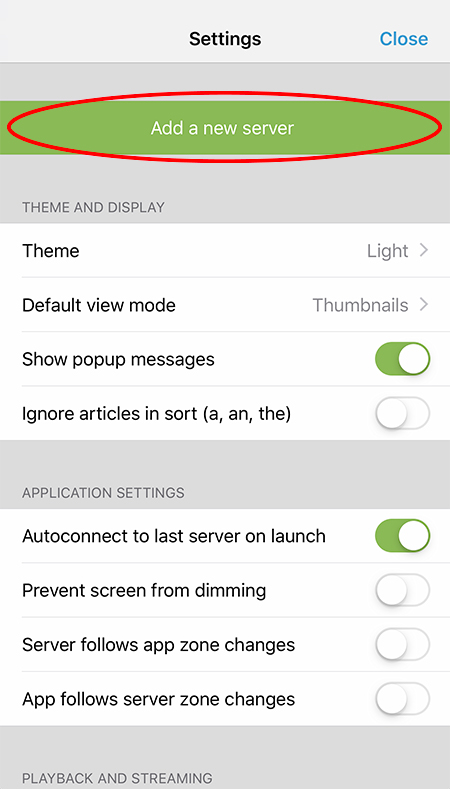
Open the JRemote app and then select “Add a new server”
Step 2
Select “Add a new server”
Step 3
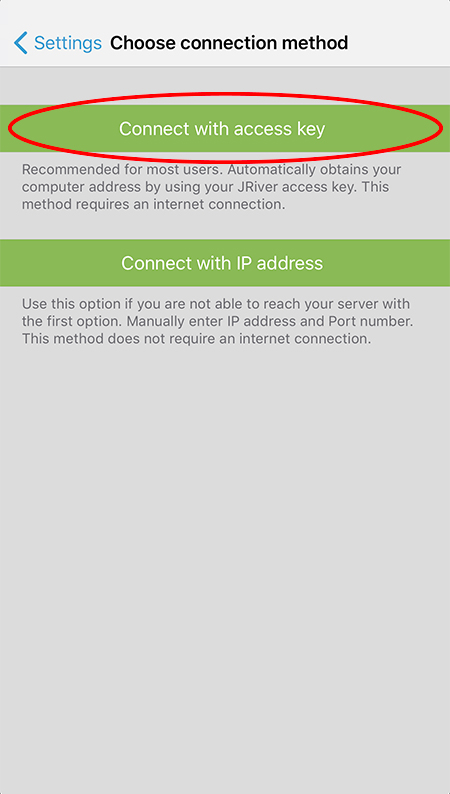
Select “Connect with access key”
Step 4
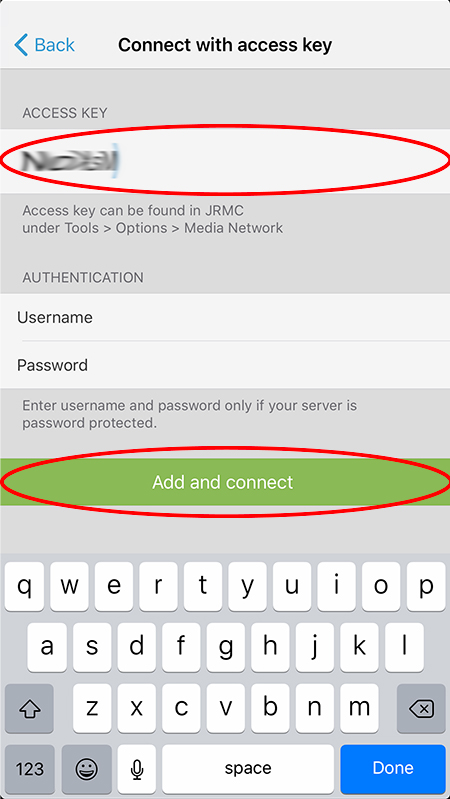
Enter the “ACCESS KEY” from JRiver Setup Step 7.
The “Access key” is unique for each user and can be found by opening JRiver Media Center and selecting Options > Options… > Media Network. It will displayed near the top of the “Media Network” panel.
Once the access key has been entered, select “Add and connect”
Step 5
Now the JRemote app is connected to your JRiver Media Center.
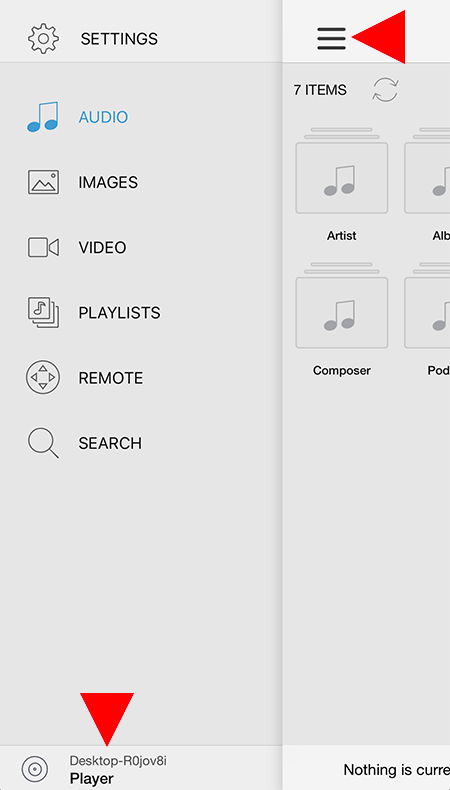
To select your MSB Product and get media playing, click the three line menu icon in the top left corner of your mobile device.
In the menu panel the opens on the left select the concentric circle emblem at the bottom of the panel to open the zone selection.
Step 6
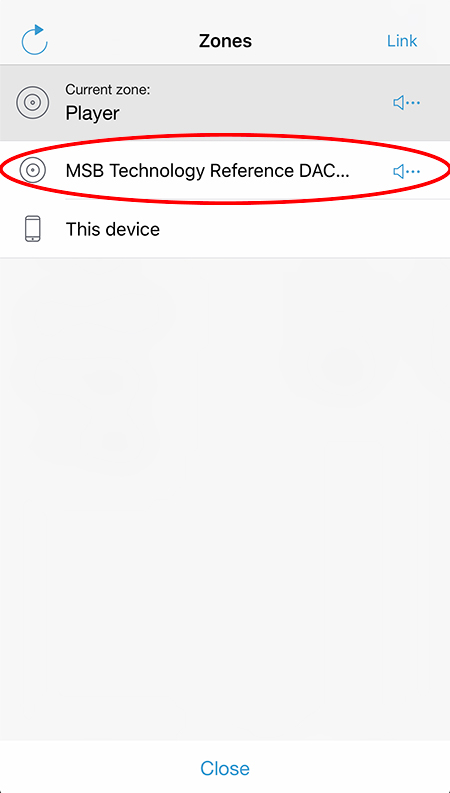
In the “Zones” Panel, select the MSB product that you wish to play your media files.
Step 7
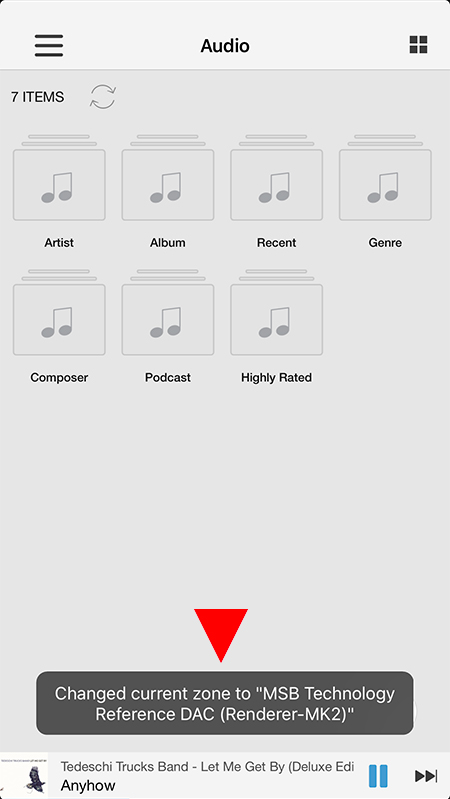
Once you have selected your MSB product it should display a message near the bottom of the screen that notes that the “current zone” has changed.
Step 8
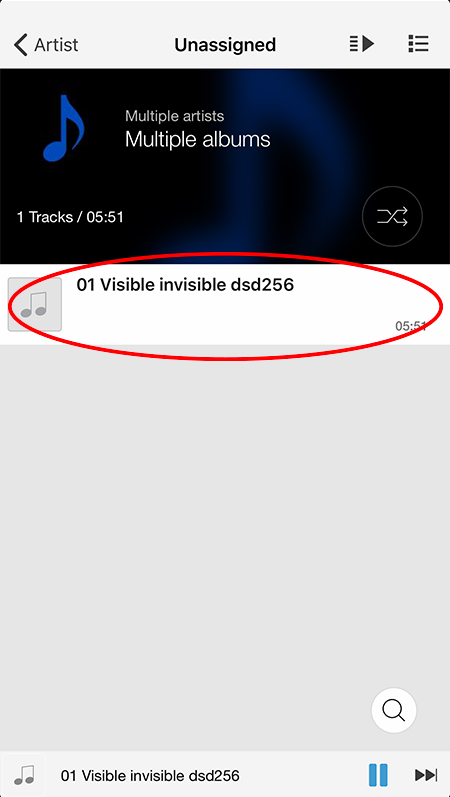
At this point, your MSB product is selected and enabled to play media from your JRiver Media Center. You can play media by simply selecting the media you wish to play.
Step 9
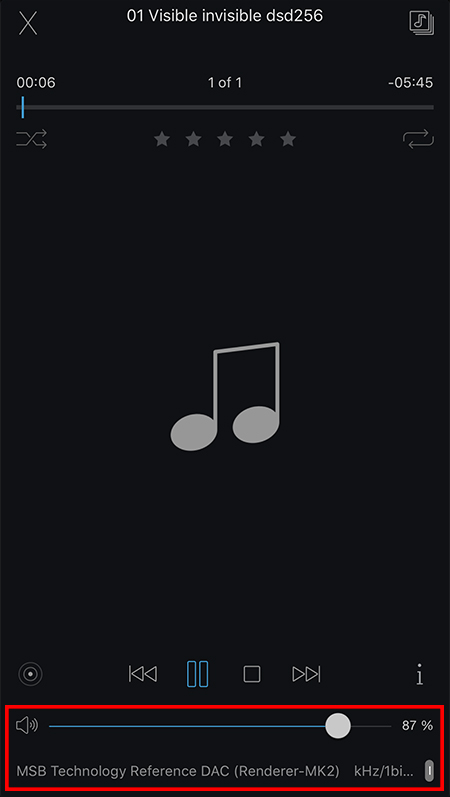
When media is playing, the zone is noted at the bottom of the screen along with a volume slider that will control your MSB product volume.
