Overview | Network Setup | JRiver Setup | Roon Setup | Firmware
Install JRiver
If you have not already done so, install the JRiver media center on your computer.
The download files can be found at the JRiver website below.
Install The Network Renderer V2
* Unplug the unit before installing module *
While your system is unplugged, install the new input module. We recommend watching our input and output module video to learn proper module handling and avoid damaging your input modules or product during this process.
Plug your Renderer V2 module into your home network (either a network switch or directly into your network router) using your preferred ethernet (cat6) cable.
Enabling your device in JRiver
Step 1
Open JRiver on your computer and power on your MSB DAC and/or Digital Director with the Network Renderer V2 installed and connected to your home network.
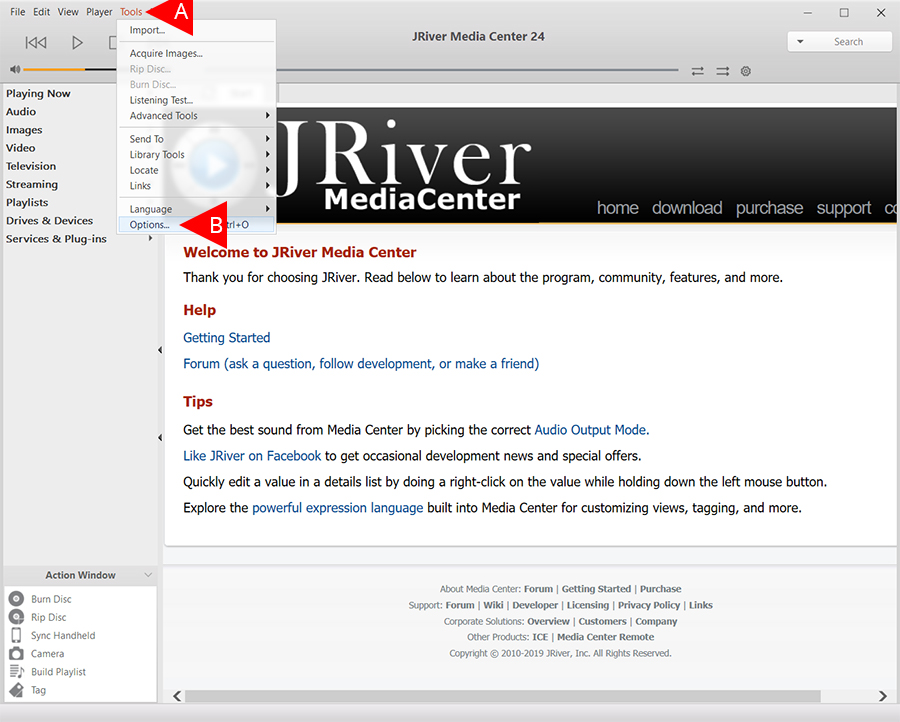
A. Select “Tools” from the top menu bar.
B. Select “Options” from the drop down panel.
Step 2
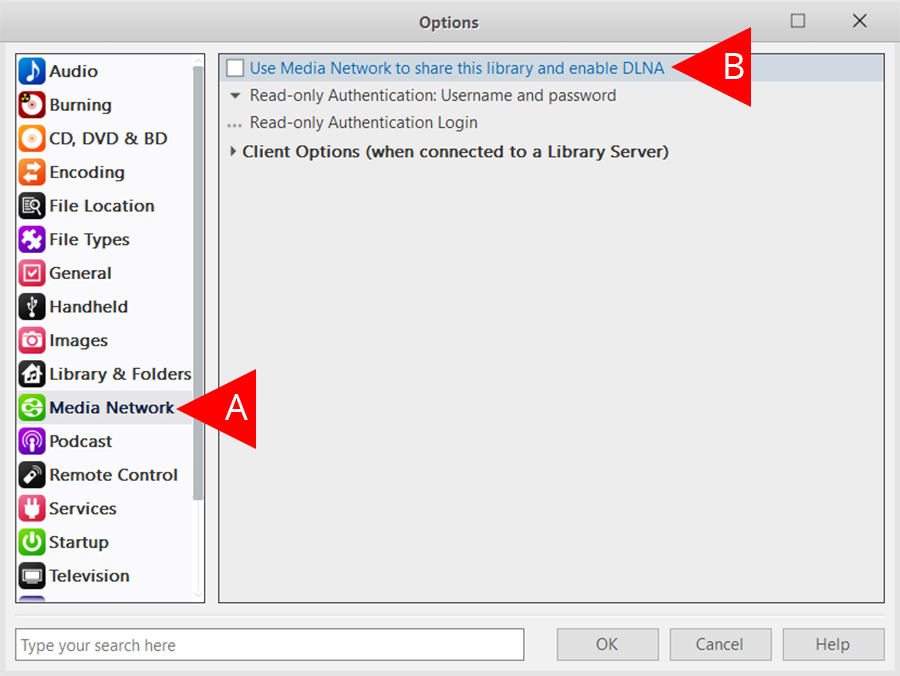
A. Select “Media Network” from the side panel on the left.
B. Select “Use Media Network to share this library and enable DLNA” from the main panel.
Step 3
A. Select “Next”.
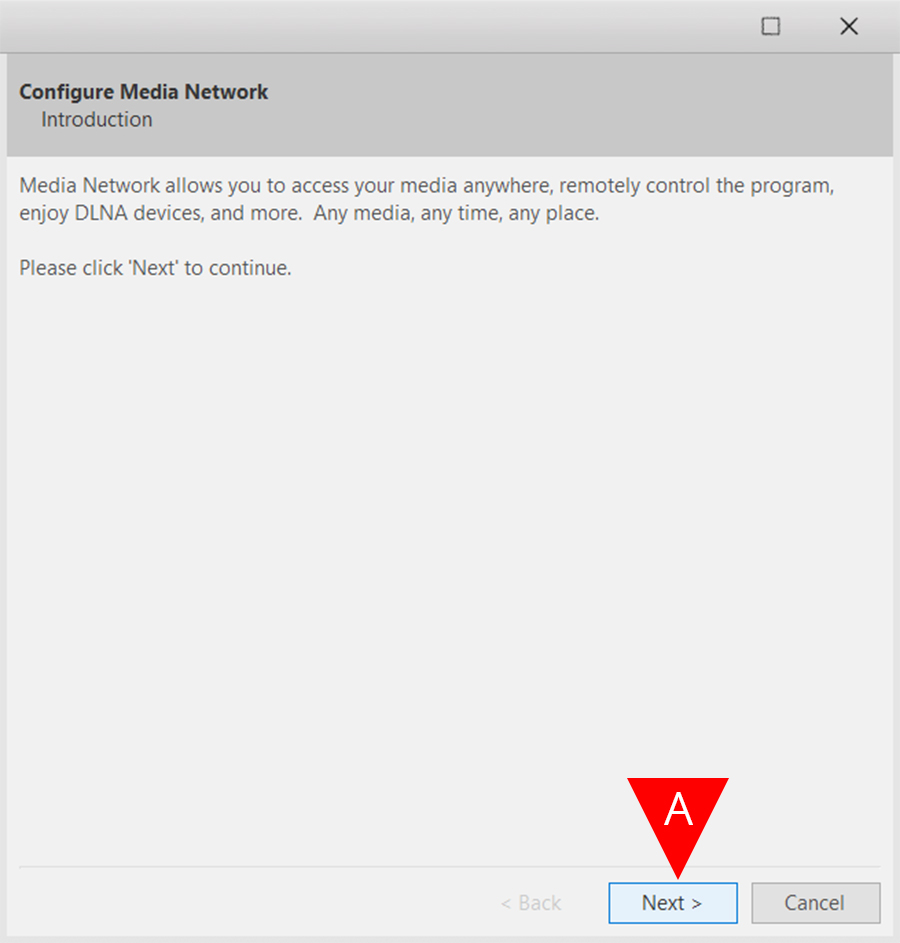
Step 4
A. Select “Next”.
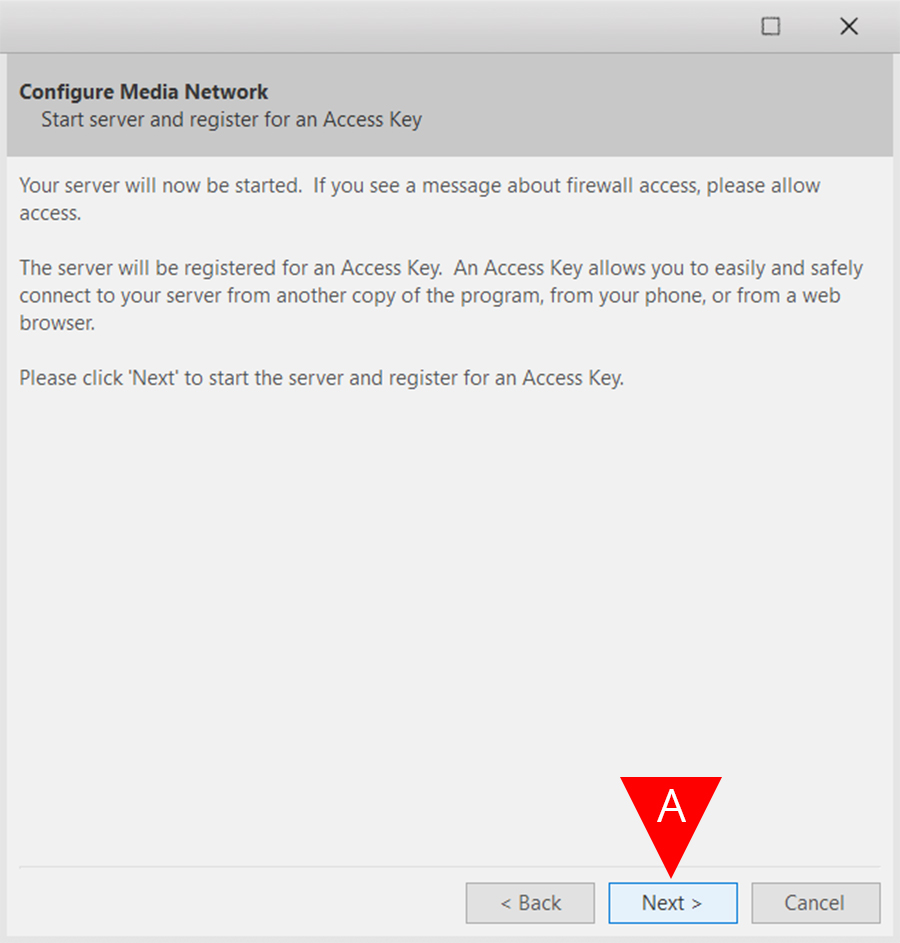
Step 5
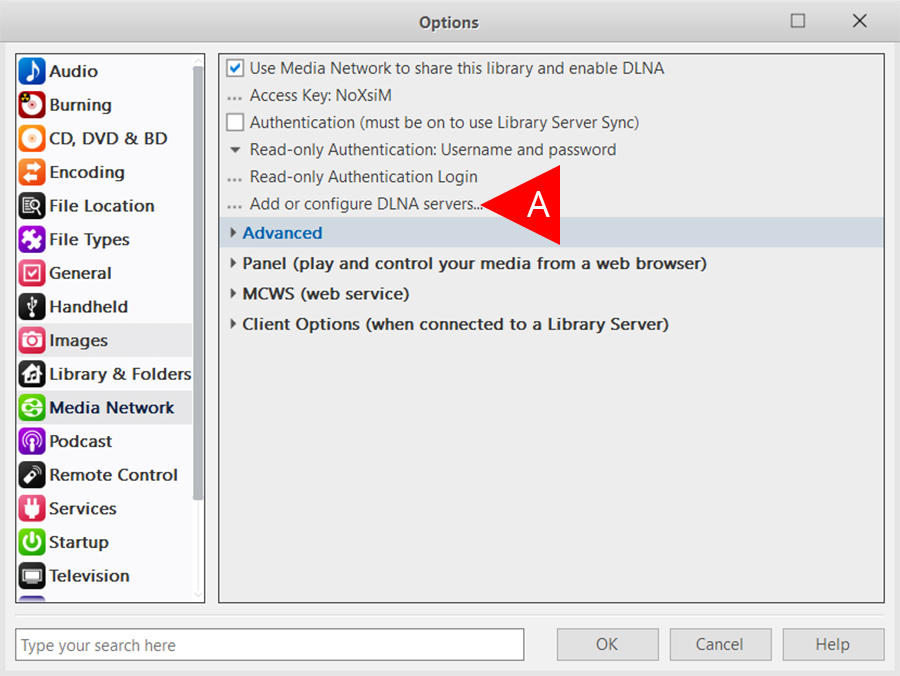
*** NOTE. The “Access Key” at the top of this message will be needed later for the JRemote setup. It is unique for each user and can be found anytime in the options menu. ***
A. Select “OK”.

Step 6
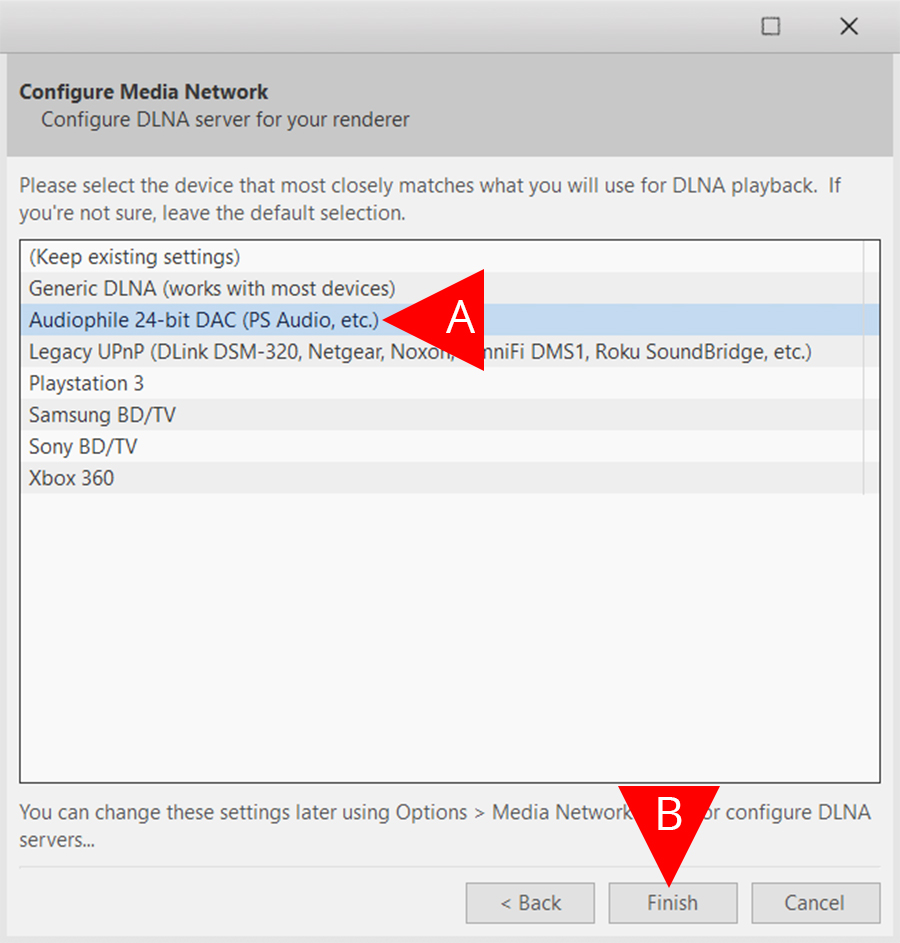
A. Select “Audiophile 24-bit DAC (PS Audio, etc.)” from the list.
B. Select “Finish”.
Step 8
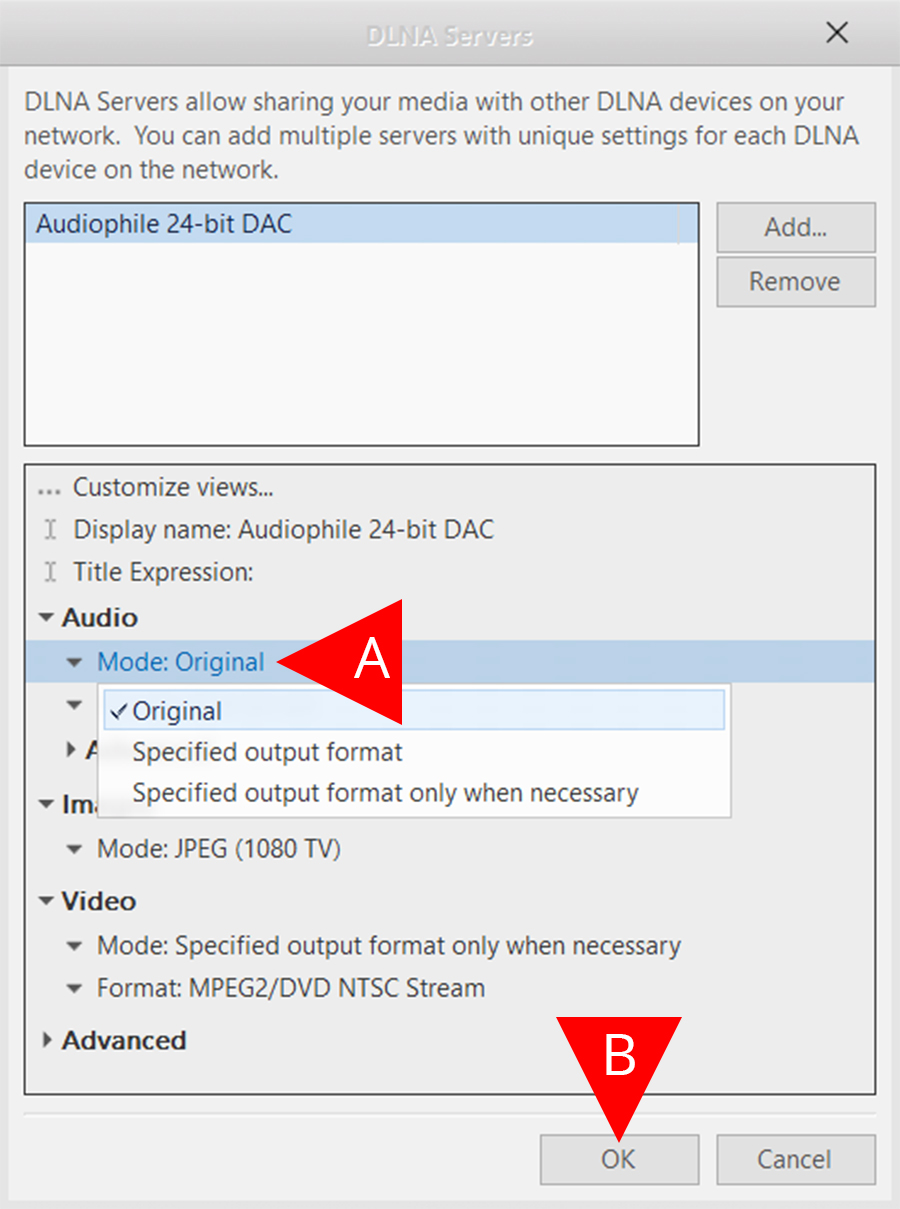
A. Select “Mode” from the “Audio” tab and select “Original” from the drop down menu.
B. Select “OK”.
Step 9
A. After closing out the options menu and returning to the JRiver media center, click once on the MSB product listed in the “Playing Now” section of the left side panel.
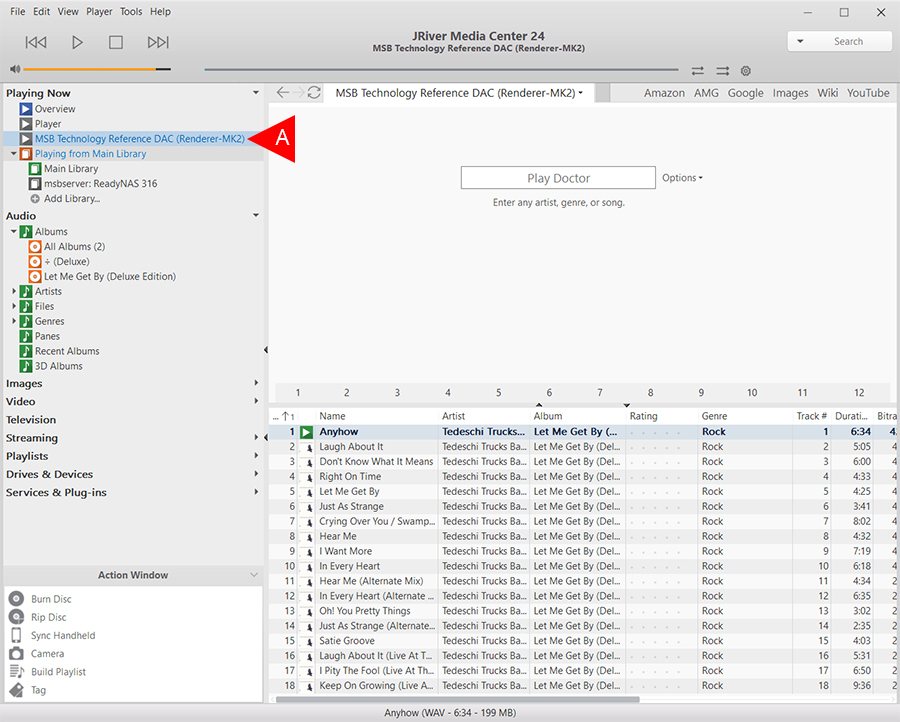
Step 10
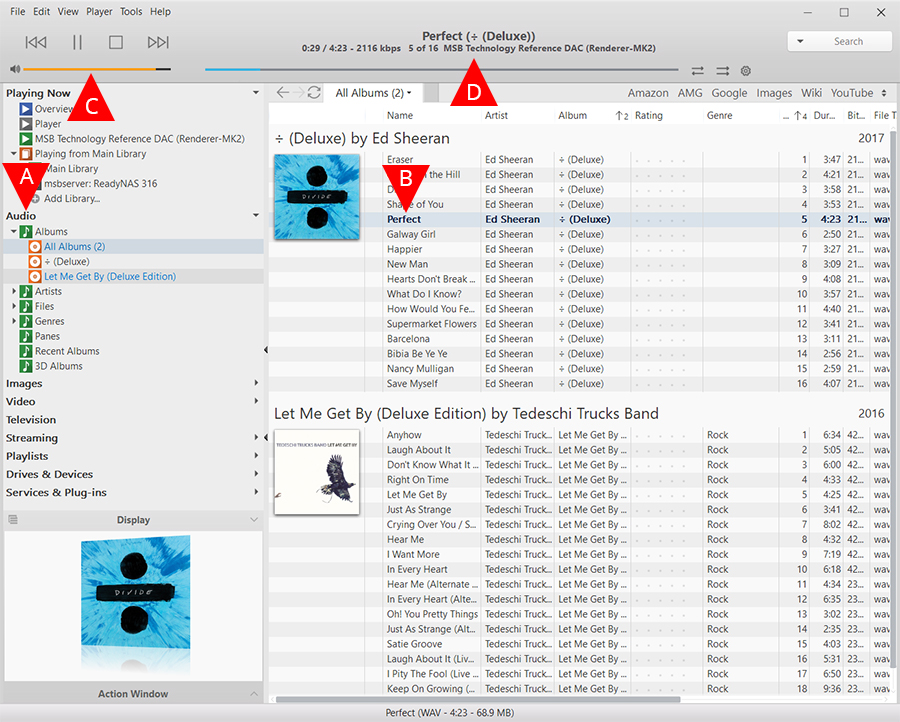
A. After clicking on the MSB product in the “Playing Now” section, select your audio from the “Audio” section of the left side panel.
B. Then select the music you wish to play from the main panel.
C. The volume slider in the top left hand corner will control the volume on your MSB DAC.
D. The information of the track and where it is being played should display in the center of the top panel.
Step 1
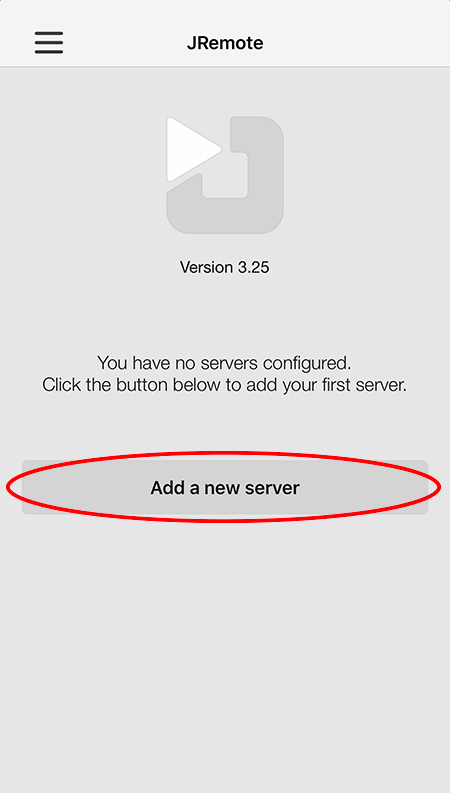
JRiver Media Center must be open on the host computer for the JRemote to function.
Open the JRemote app and then select “Add a new server”.
Step 2
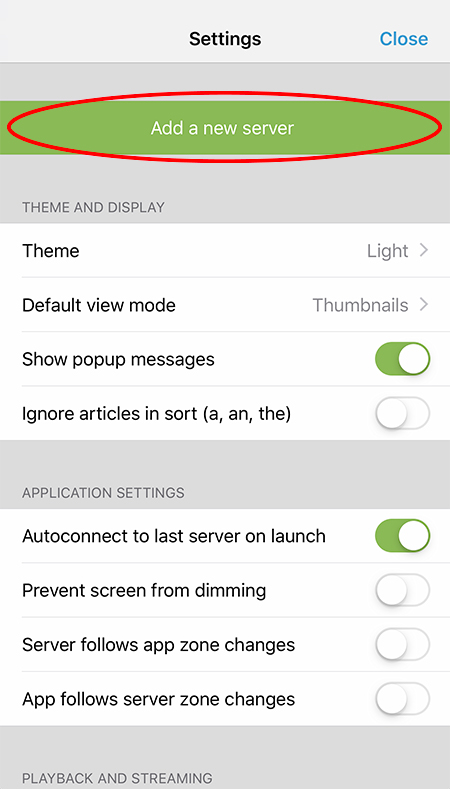
Select “Add a new server”.
Step 3
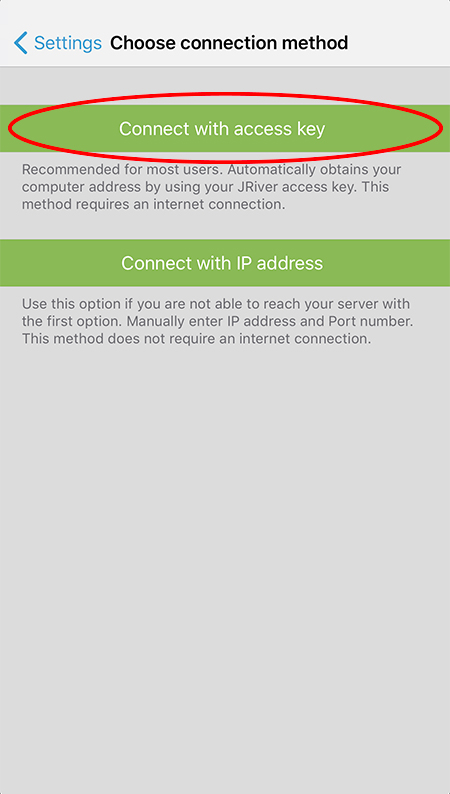
Select “Connect with access key”.
Step 4
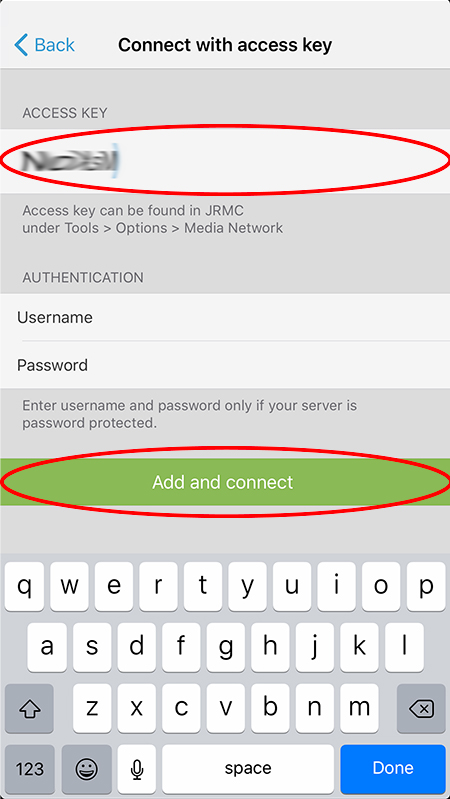
Enter the “ACCESS KEY” from JRiver Setup Step 7.
The “Access key” is unique for each user and can be found by opening JRiver Media Center and selecting Options > Options… > Media Network. It will displayed near the top of the “Media Network” panel.
Once the access key has been entered, select “Add and connect”.
Step 5
Now the JRemote app is connected to your JRiver Media Center.
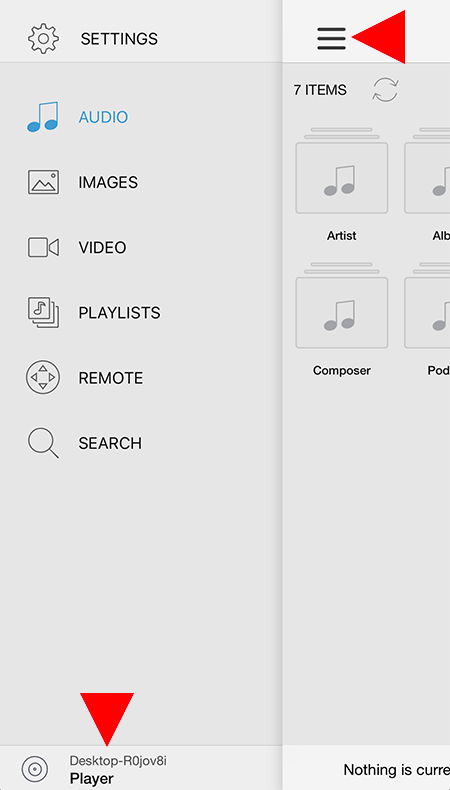
To select your MSB Product and get media playing, click the three line menu icon in the top left corner of your mobile device.
In the menu panel the opens on the left select the concentric circle emblem at the bottom of the panel to open the zone selection.
Step 6
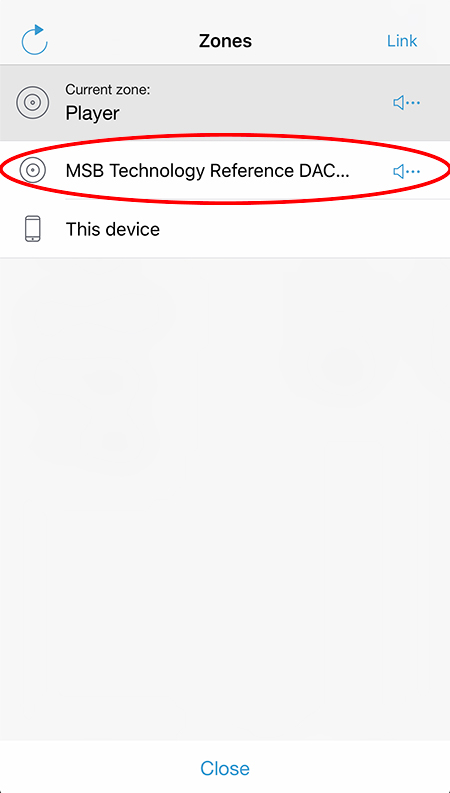
In the “Zones” Panel, select the MSB product that you wish to play your media files.
Step 7
Once you have selected your MSB product it should display a message near the bottom of the screen that notes that the “current zone” has changed.
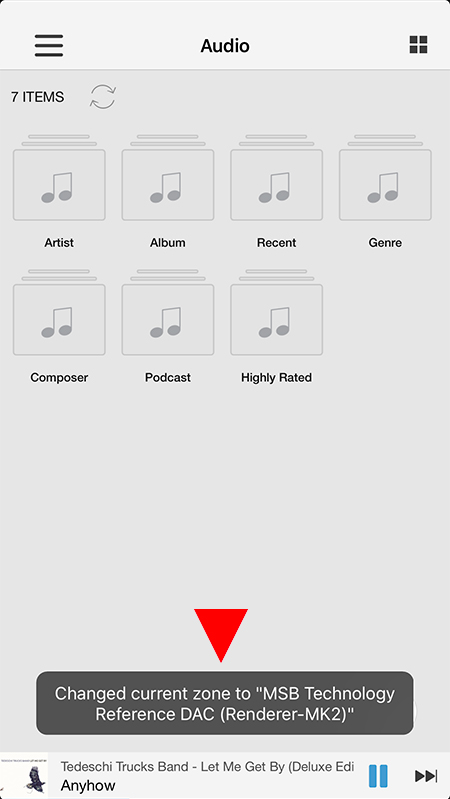
Step 8
At this point, your MSB product is selected and enabled to play media from your JRiver Media Center. You can play media by simply selecting the media you wish to play.
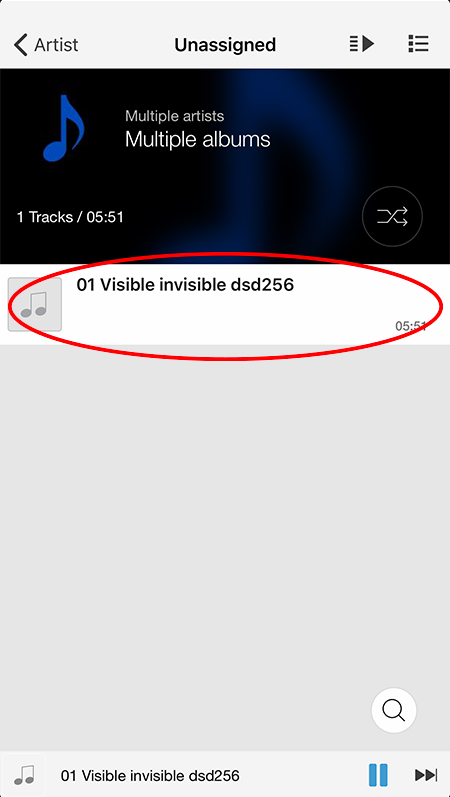
Step 9
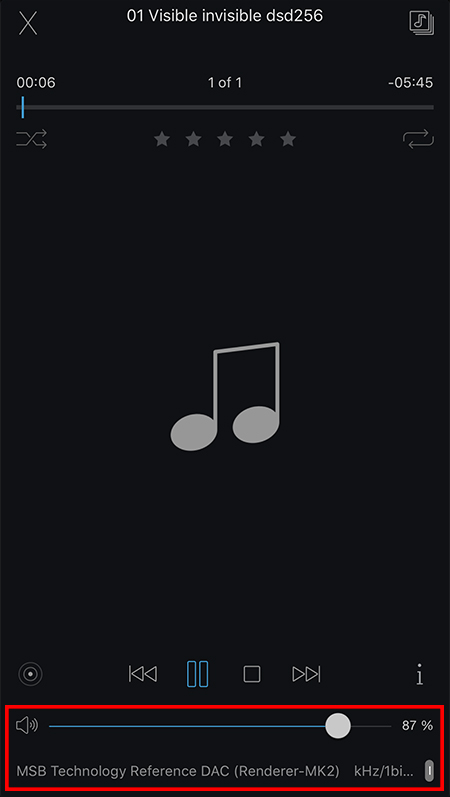
When media is playing, the zone is noted at the bottom of the screen along with a volume slider that will control your MSB product volume.
