Overview | Network Setup | JRiver Setup | Roon Setup | Firmware
Roon Setup
Updated 01.04.2019
Instructions with Roon Version 1.5
Install Roon
If you have not already done so, install Roon on your computer.
The download files can be found at the Roon Labs website below.
roonlabs.com/downloads
Install The Network Renderer V2
* Unplug the unit before installing module *
While your system is unplugged, install the new input module. We recommend watching our input and output module video to learn proper module handling and avoid damaging your input modules or product during this process.
Plug your Renderer V2 module into your home network (either a network switch or directly into your network router) using your preferred ethernet (cat6) cable.
Enabling your device in Roon
Step 1
Open Roon on your computer and power on your MSB DAC and/or Digital Director with the Network Renderer V2 installed and connected to your home network.
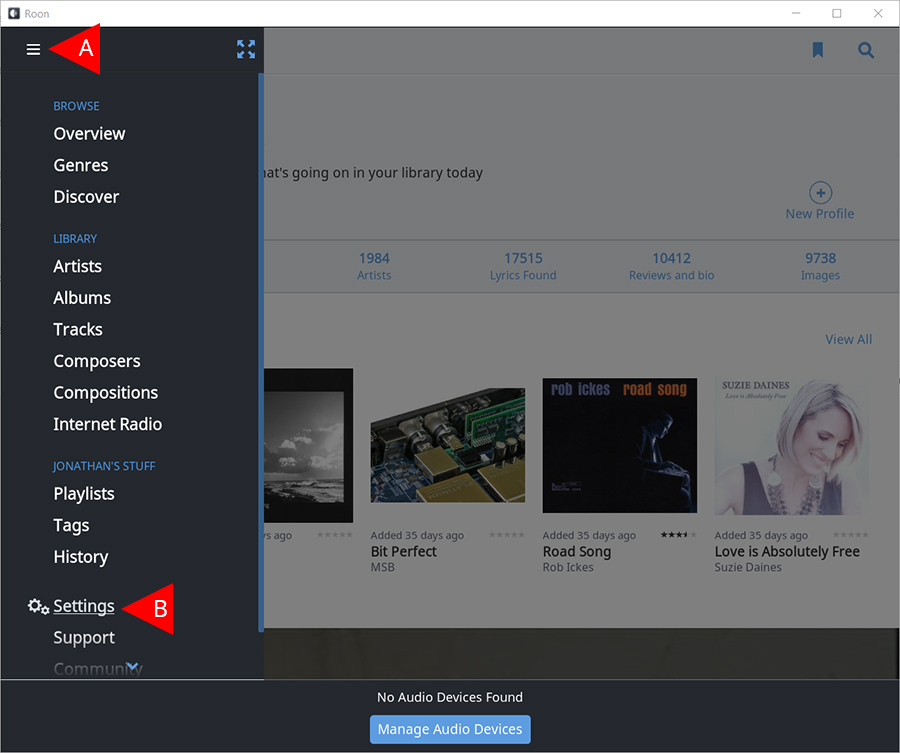
A. Open the navigation menu in Roon by clicking the icon in the top left of the Roon media player.
B. Scroll down to the bottom of the menu panel and select “Settings”.
Step 2
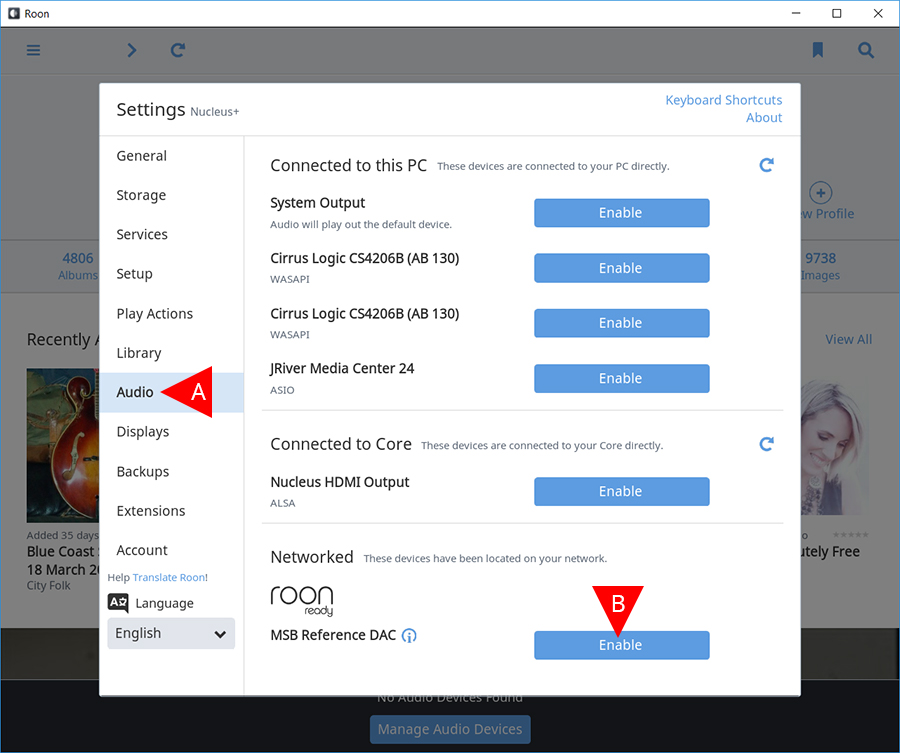
A. Select “Audio” from the left menu panel.
B. Find your MSB product under the “Networked” section in the main panel and select “Enable”.
(optional) MSB recommends that you disable any and all other devices that are not in use in this panel. Devices can be disabled by selecting the settings cog wheels to the right of the device that is currently active.
Step 3
(optional)
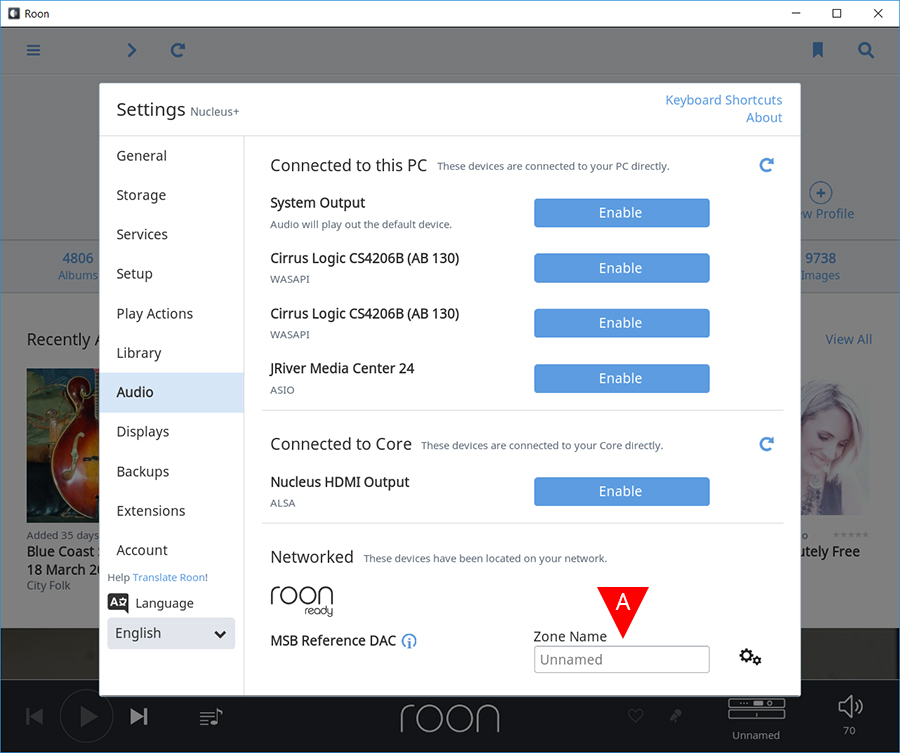
A. At this point your MSB DAC is enabled and you should no longer see the blue “Enable” button, but instead see a box titled “Zone Name”. This gives you the option to name the MSB DAC or “Zone” as you choose and this can be changed at anytime.
Step 4
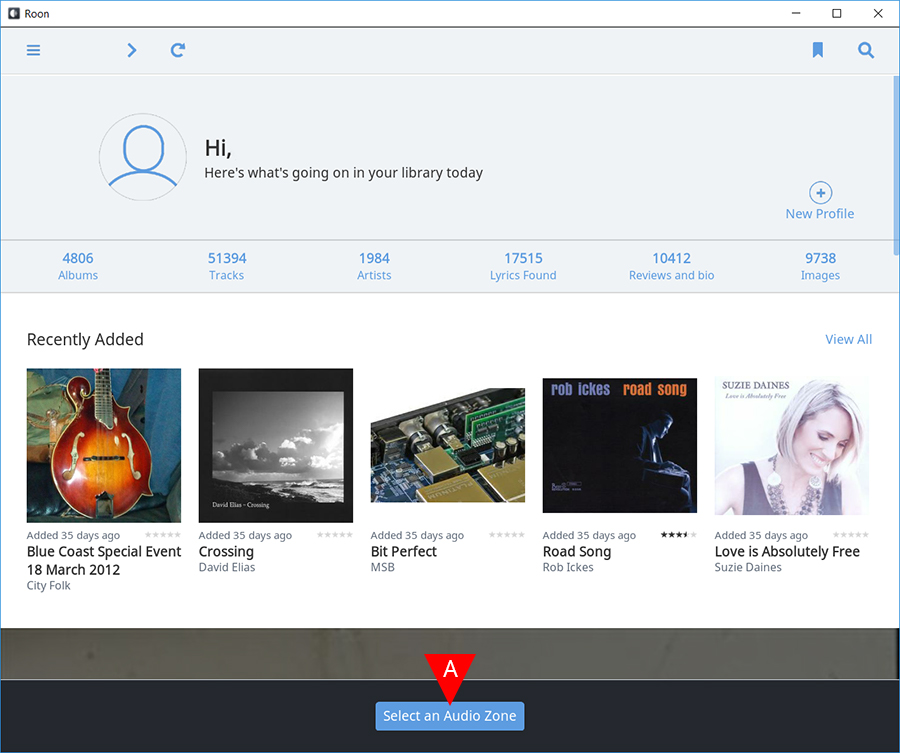
A. Now that your MSB DAC is enabled, select “Select an Audio Zone”.
Step 5
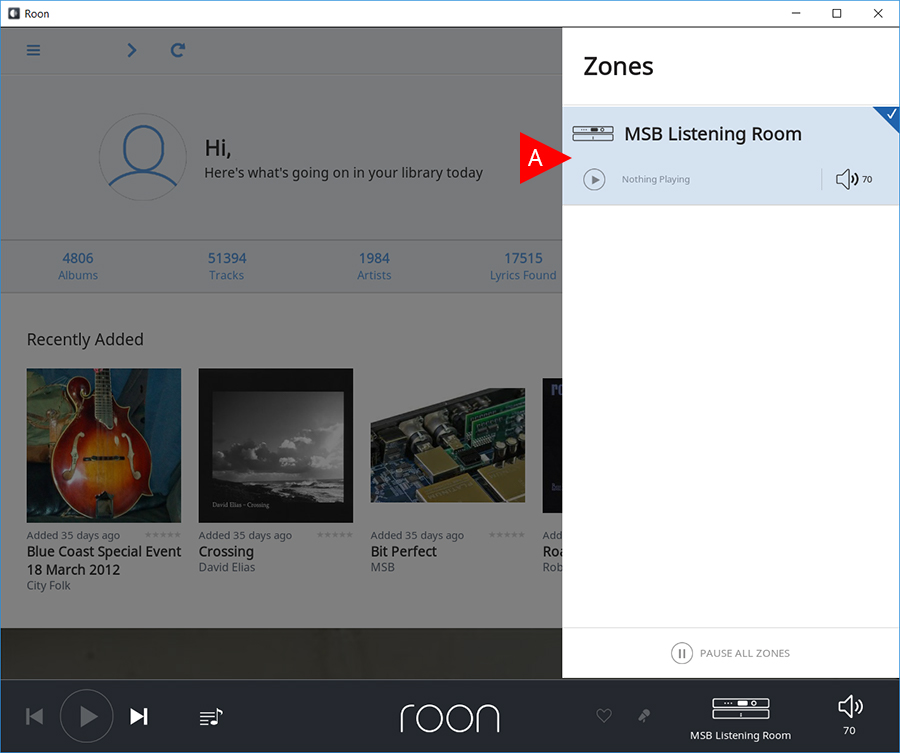
A. In the “Zones” panel to the right, select your MSB product. The “Unnamed” section in the example image should show your personalized name if you named the zone something specific from above in Step 3.
Step 6
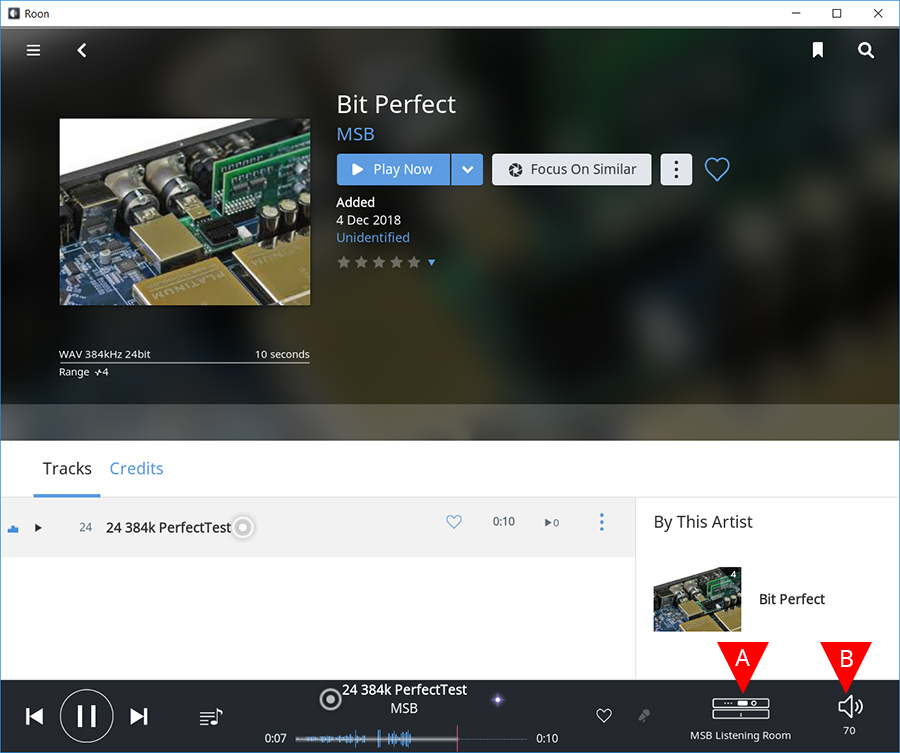
The Renderer V2 is now ready to play music selected from your Roon library.
A. The currently selected zone is displayed in the bottom right hand corner of the screen to the left of the volume symbol.
B. If you select the volume symbol, you can control the volume of your MSB DAC by using the small slider that comes up. This volume slider is the native DAC volume control and is the exact same as changing the volume with your product remote or by doing it directly with the knob on the DAC.
Resetting default settings
Step 1
To reset your renderer to the default settings follow the steps below. This is a recommended step if you are experiencing any technical issues before contacting MSB for support.
A. Open the navigation menu in Roon by clicking the icon in the top left of the Roon media player.
B. Scroll down to the bottom of the menu panel and select “Settings”.

Step 2
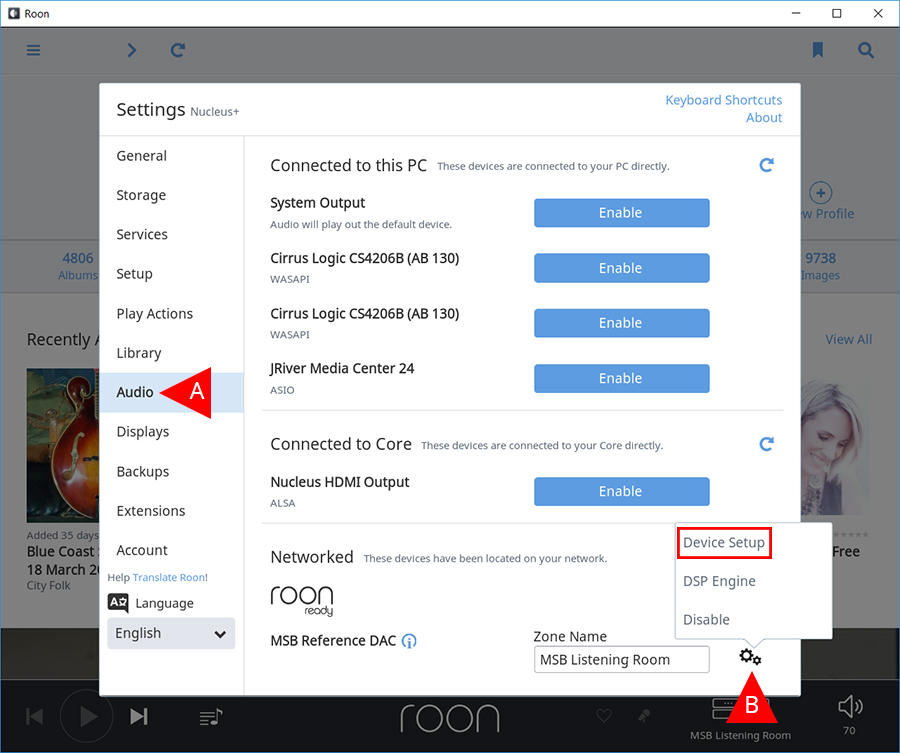
A. Select “Audio” from the left menu panel.
B. Find your MSB product under the “Networked” section in the main panel. Select setting cog wheels to the right of the zone name and select “Device Setup”.
Step 3
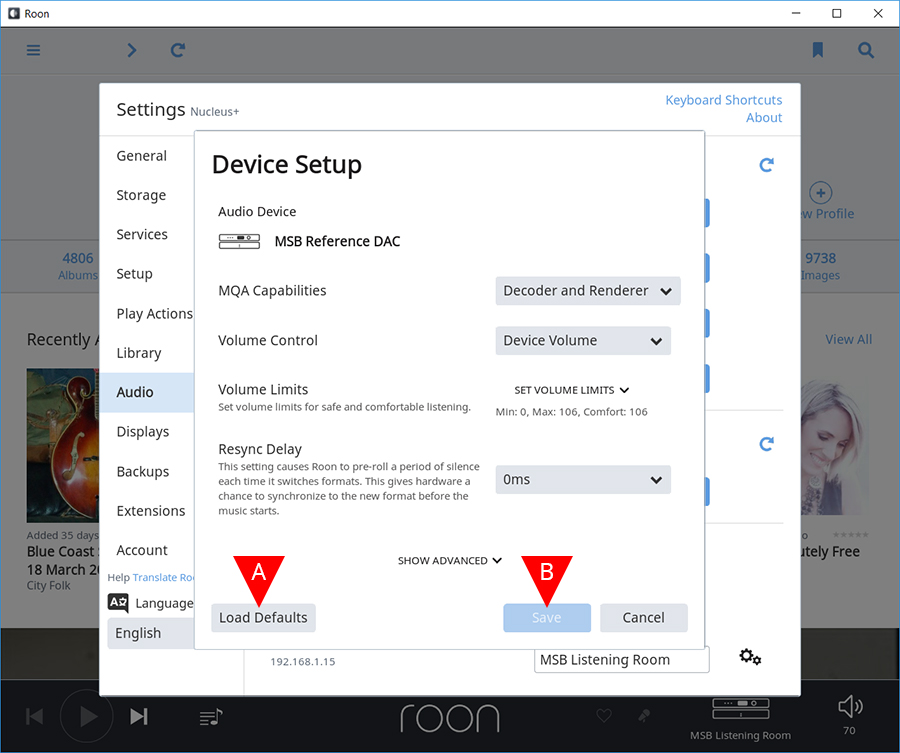
A. Select “Load Defaults” from the bottom left of the panel.
B. Select “Save”.
*** NOTE. If the “Save” selection remains un-selectable, then the default settings are currently set. ***
